This topic is for converting single instance stand alone database to RAC instance. I am demonstrating this in oracle12c version. There are several ways we can do this.. But RMAN restore is preferred method for least downtime in bigger Tera Byte size database.
If you want to convert from Oracle11g to Oracle12c, then i would recommend to upgrade the stand alone DB to Oracle12c and complete the testing before you migrate to RAC. This will help narrow down the issues when we do one thing at a time.
I followed the oracle document for this RAC migration. Here is the reference document for my post. I also referred the metalink Doc ID 747457.1. Please review the oracle document before you start doing in your environment. All my steps needs to be tested in your Test environment before you do in your production environment.
Prerequisite :
Install cluster and ASM on all nodes
Install the oracle software
Stand alone DB and RAC must be same database version.
ASM disks size should be good enough to accommodate the source database.
Cluster should be up and running on RAC node.
Source DB info :
Target DB info :
srvctl add database -d usben -o $ORACLE_HOME -p +DATA/USBEN/PARAMETERFILE/spfileusben.ora
srvctl add instance -d usben -i usben1 -n RACTEST1.localdomain
srvctl add instance -d usben -i usben2 -n RACTEST2.localdomain
srvctl add instance -d usben -i usben3 -n RACTEST3.localdomain
Step 8 Move the password file to ASM Storage.
The password file is currently on local file system. Starting Oracle12c, it should be in ASM storage centralized location.
Created the password file on ASM disk as below.
[oracle@RACTEST1 dbs]$ orapwd file='+DATA/USBEN/orapwusben' entries=10 dbuniquename=usben password=password
Now the password file is common for all three nodes.
Step 9 Restart the RAC instance using SRVCTL command.
If you want to convert from Oracle11g to Oracle12c, then i would recommend to upgrade the stand alone DB to Oracle12c and complete the testing before you migrate to RAC. This will help narrow down the issues when we do one thing at a time.
I followed the oracle document for this RAC migration. Here is the reference document for my post. I also referred the metalink Doc ID 747457.1. Please review the oracle document before you start doing in your environment. All my steps needs to be tested in your Test environment before you do in your production environment.
Prerequisite :
Install cluster and ASM on all nodes
Install the oracle software
Stand alone DB and RAC must be same database version.
ASM disks size should be good enough to accommodate the source database.
Cluster should be up and running on RAC node.
Source DB info :
| Host Name | usbenhost |
| Instance name | usben |
| DB name | usben |
| Storage type | file system |
Target DB info :
| Host Name | ractest1, ractest2, ractest3 |
| Instance name | usben1, usben2,usben3 |
| DB name | usben |
| Storage type | ASM |
There are two major task on this migration, The first part is to migrate the database from stand alone server(usbenhost) to ractest1 database server. I am using RMAN restore to migrate the database.
There are multiple ways we can restore the database. As part of the migration, i am also moving the database to ASM disk.
Here are the high level steps for option 1 & Option 2.
Now let us start converting the DB to RAC database!
My standby alone database is already migrated from stand alone server to RAC node . Here is the database info :
select name from v$datafile
union
select name from v$controlfile
union
select member from v$logfile
union
select name from v$tempfile

Step 1
Make sure, MAXINSTANCES and MAXLOGFILES Parameters are good enough for RAC environment. I verified my control file and looks good for me. If not, please recreate the control file with appropriate values.

Step 2
Create the redo log group and undo tablespace for each instance. The redo and undo are handled on per instance basis. We need minimum two redo log groups for each instance and it should be created on shared storage. My case, I keep two redo log groups. I will let you choose the number of redo log groups according to your environment.
Each redo log group should be assigned to thread number in RAC database. It is very important to specify the thread number when you add or create redo log files. This will ensure that the redo log file is assigned to right instance.
Each instance is assigned a thread number starting at 1. Hence i am creating redo log groups for thread#2 and thread#3.
Here i have three node RAC. Hence i am creating redo and undo for other two instance.

Step 3 Recreate the spfile with RAC parameters
The spfile is stored in ASM storage. Create pfile from spfile and modify the pfile with RAC related parameters

Add the below parameters in pfile for ractest1 node. I also changed the archive log destination location to ASM disk.
There are multiple ways we can restore the database. As part of the migration, i am also moving the database to ASM disk.
- Duplicate the database using target database backup. Click here for details.
- Duplicate the database using Active database duplication. Click here for details.
- Regular RMAN restore approach. Click here for details.
- Setup the Standby Database. Click here for details.
Here are the high level steps for option 1 & Option 2.
- Shutdown the application.
- Restore the database in RAC host and open the database
- Convert the DB to RAC DB
- Start the application.
- Restore the database in RAC host
- Apply the daily archive log files in RAC host.
- On the cut over date. apply all the archive log files.
- Shutdown the application,
- Open the stand alone database in RAC node
- Convert the DB to RAC DB
- Start the application.
- Setup the standby database in RAC host.
- Shutdown the application,
- Switch over the database or activate the database in RAC host
- Convert the DB to RAC DB
- Start the application.
Now let us start converting the DB to RAC database!
My standby alone database is already migrated from stand alone server to RAC node . Here is the database info :
select name from v$datafile
union
select name from v$controlfile
union
select member from v$logfile
union
select name from v$tempfile

Step 1
Make sure, MAXINSTANCES and MAXLOGFILES Parameters are good enough for RAC environment. I verified my control file and looks good for me. If not, please recreate the control file with appropriate values.

Step 2
Create the redo log group and undo tablespace for each instance. The redo and undo are handled on per instance basis. We need minimum two redo log groups for each instance and it should be created on shared storage. My case, I keep two redo log groups. I will let you choose the number of redo log groups according to your environment.
Each redo log group should be assigned to thread number in RAC database. It is very important to specify the thread number when you add or create redo log files. This will ensure that the redo log file is assigned to right instance.
Each instance is assigned a thread number starting at 1. Hence i am creating redo log groups for thread#2 and thread#3.
Here i have three node RAC. Hence i am creating redo and undo for other two instance.
alter database add logfile
thread 2 group 6 ('+DATA') size 50m reuse;
alter database add logfile
thread 2 group 7 ('+DATA') size 50m reuse;
alter database add logfile
thread 3 group 8 ('+DATA') size 50m reuse;
alter database add logfile
thread 3 group 9 ('+DATA') size 50m reuse;
alter database enable public thread 2;
alter database enable public thread 3;
create undo tablespace UNDOTBS2 datafile
'+DATA' size 50M;
create undo tablespace UNDOTBS3 datafile
'+DATA' size 50M;
|

Step 3 Recreate the spfile with RAC parameters
The spfile is stored in ASM storage. Create pfile from spfile and modify the pfile with RAC related parameters

Add the below parameters in pfile for ractest1 node. I also changed the archive log destination location to ASM disk.
*.log_archive_dest_1='location=+DATA/USBEN/ARCH'
*.cluster_database_instances=3
*.cluster_database=true
usben1.instance_number=1
usben2.instance_number=2
usben3.instance_number=3
usben1.thread=1
usben2.thread=2
usben3.thread=3
usben1.undo_tablespace='UNDOTBS1'
usben2.undo_tablespace='UNDOTBS2'
usben3.undo_tablespace='UNDOTBS3'
|
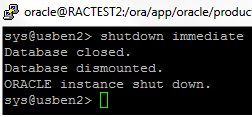
Now shutdown the single instance database in ractest1 node. Recreate the spfile from above modified pfile.
Now spfile is updated with RAC parameters. Now we are ready to start the single instance into RAC instance.
Step 4 Drop the static listener if you created during the database duplication process. Use NETCA to configure the listener in RAC environment. Copy the password file from ractest1 instance to other two nodes(ractest2, ractest3).
sys@usben> shutdown immediate
Database closed.
Database dismounted.
ORACLE instance shut down.
sys@usben>
sys@usben1> create
spfile='+DATA/USBEN/PARAMETERFILE/spfileusben.ora' from PFILE;
File created.
sys@usben1>
|
Now spfile is updated with RAC parameters. Now we are ready to start the single instance into RAC instance.
Step 5 Start the RAC instance on all three node
Add the entry in /etc/oratab
ractest1 host : usben1:/ora/app/oracle/product/12.1.0.1/db_1:N
ractest2 host : usben2:/ora/app/oracle/product/12.1.0.1/db_1:N
Before you start the instance, make sure you set the new environment variable. Since the instance name is changed from usben to usben1. You get the below error if you don't set the ORACLE_SID with new value USBEN1
update the pfile on all three instance as below. The pfile initusben.ora is no longer valid. Since we are going to convert the single instance to RAC instance.
[oracle@RACTEST1 dbs]$ cat initusben1.ora
SPFILE='+DATA/USBEN/PARAMETERFILE/spfileusben.ora'
[oracle@RACTEST1 dbs]$


Step 6
Execute catclust.sql on ractest1 node. This script creates the dictionary views needed for Oracle RAC databases. I run this script even before we configure the RAC instance.
Step 7 Register the RAC instance in the CRS.
Add the entry in /etc/oratab
ractest1 host : usben1:/ora/app/oracle/product/12.1.0.1/db_1:N
ractest2 host : usben2:/ora/app/oracle/product/12.1.0.1/db_1:N
ractest3 host : usben3:/ora/app/oracle/product/12.1.0.1/db_1:N
> startup nomount pfile=$ORACLE_HOME/dbs/initusben1.ora
ORA-29760: instance_number parameter not specified
|
[oracle@RACTEST1 dbs]$ cat initusben1.ora
SPFILE='+DATA/USBEN/PARAMETERFILE/spfileusben.ora'
[oracle@RACTEST1 dbs]$
[oracle@RACTEST2 dbs]$ cat initusben2.ora
SPFILE='+DATA/USBEN/PARAMETERFILE/spfileusben.ora'
[oracle@RACTEST2 dbs]$
SPFILE='+DATA/USBEN/PARAMETERFILE/spfileusben.ora'
[oracle@RACTEST2 dbs]$
[oracle@RACTEST3 dbs]$ cat initusben3.ora
SPFILE='+DATA/USBEN/PARAMETERFILE/spfileusben.ora'
[oracle@RACTEST3 dbs]$
Now start the instance on all three node with new spfile.SPFILE='+DATA/USBEN/PARAMETERFILE/spfileusben.ora'
[oracle@RACTEST3 dbs]$


Step 6
Execute catclust.sql on ractest1 node. This script creates the dictionary views needed for Oracle RAC databases. I run this script even before we configure the RAC instance.
[oracle@RACTEST1 dbs]$ cd $ORACLE_HOME/rdbms/admin
[oracle@RACTEST1 admin]$ sqlplus / as sysdba
SQL*Plus: Release 12.1.0.2.0 Production on Sat Feb 27 05:34:27 2016
Copyright (c) 1982, 2014, Oracle. All rights reserved.
Connected to:
Oracle Database 12c Enterprise Edition Release 12.1.0.2.0 - 64bit Production
With the Partitioning, Real Application Clusters, Automatic Storage Management, OLAP,
Advanced Analytics and Real Application Testing options
SQL> !pwd
/ora/app/oracle/product/12.1.0.1/db_1/rdbms/admin
SQL> @catclust.sql
Session altered.
Package created.
Package body created.
PL/SQL procedure successfully completed.
View created.
Synonym created.
Grant succeeded.
View created.
Grant succeeded.
View created.
Grant succeeded.
Synonym created.
Synonym created.
Synonym created.
Synonym created.
Synonym created.
Synonym created.
Synonym created.
Synonym created.
Synonym created.
Synonym created.
Synonym created.
Synonym created.
PL/SQL procedure successfully completed.
Session altered.
SQL>
|
Step 7 Register the RAC instance in the CRS.
srvctl add database -d usben -o $ORACLE_HOME -p +DATA/USBEN/PARAMETERFILE/spfileusben.ora
srvctl add instance -d usben -i usben1 -n RACTEST1.localdomain
srvctl add instance -d usben -i usben2 -n RACTEST2.localdomain
srvctl add instance -d usben -i usben3 -n RACTEST3.localdomain
[oracle@RACTEST1 dbs]$ srvctl add database -d usben -o
$ORACLE_HOME -p
+DATA/USBEN/PARAMETERFILE/spfileusben.ora
[oracle@RACTEST1 dbs]$ srvctl add instance -d usben -i usben1 -n
RACTEST1.localdomain
[oracle@RACTEST1 dbs]$ srvctl add instance -d usben -i usben2 -n
RACTEST2.localdomain
[oracle@RACTEST1 dbs]$ srvctl add instance -d usben -i usben3 -n
RACTEST3.localdomain
[oracle@RACTEST1 dbs]$
|
Step 8 Move the password file to ASM Storage.
The password file is currently on local file system. Starting Oracle12c, it should be in ASM storage centralized location.
Created the password file on ASM disk as below.
[oracle@RACTEST1 dbs]$ orapwd file='+DATA/USBEN/orapwusben' entries=10 dbuniquename=usben password=password
Now the password file is common for all three nodes.
Step 9 Restart the RAC instance using SRVCTL command.
Let us shutdown the DB and start the database using srvctl command.


The conversion process is completed once we start the database by using srvctl.
Step 10 RAC instance verification.
Let us run few command and see the status of all the instances in the Oracle RAC database.
select * from v$active_instances;
select host_name,instance_number,instance_name,status,thread# from gv$instance;


Checking the RAC cluster global process :
Step 11 Monitor the logs ,
Monitor the below log files and make sure no issues.
CRS_HOME/log/hostname/crsd/ – The log files for the CRS daemon
CRS_HOME/log/hostname/cssd/ – The log files for the CSS daemon
CRS_HOME/log/hostname/evmd/ – The log files for the EVM daemon
CRS_HOME/log/hostname/client/ – The log files for the Oracle Cluster Registry (OCR)
CRS_HOME/log/hostname/racg/ – The log files for the Oracle RAC high availability component
CRS_HOME/log/hostname/racg – The log files for the Oracle RAC high availability component
CRS_HOME/log/hostanme/alert.log – The alert.log for Clusterware issues.
[oracle@RACTEST1 dbs]$ srvctl start database -d usben
[oracle@RACTEST1 dbs]$ srvctl stop database -d usben
[oracle@RACTEST1 dbs]$ srvctl start database -d usben
|
The conversion process is completed once we start the database by using srvctl.
Step 10 RAC instance verification.
Let us run few command and see the status of all the instances in the Oracle RAC database.
select * from v$active_instances;
select host_name,instance_number,instance_name,status,thread# from gv$instance;


[oracle@RACTEST1 ~]$ srvctl status database -d usben
Instance usben1 is running on node RACTEST1
Instance usben2 is running on node RACTEST2
Instance usben3 is running on node RACTEST3
[oracle@RACTEST1 ~]$
|
Checking the RAC cluster global process :
[root@RACTEST1 ~]# crsctl stat resource -t
--------------------------------------------------------------------------------
Name Target State
Server State
details
--------------------------------------------------------------------------------
Local Resources
--------------------------------------------------------------------------------
ora.DATA.dg
ONLINE ONLINE
ractest1 STABLE
ONLINE ONLINE
ractest2 STABLE
ONLINE ONLINE
ractest3 STABLE
ora.LISTENER.lsnr
ONLINE ONLINE
ractest1 STABLE
ONLINE ONLINE
ractest2 STABLE
OFFLINE
OFFLINE ractest3 STABLE
ora.TEST.dg
ONLINE ONLINE
ractest1 STABLE
ONLINE ONLINE
ractest2 STABLE
ONLINE ONLINE
ractest3 STABLE
ora.VOTE.dg
ONLINE ONLINE
ractest1 STABLE
ONLINE ONLINE
ractest2 STABLE
ONLINE ONLINE
ractest3 STABLE
ora.VOTE1.dg
OFFLINE
OFFLINE ractest1 STABLE
ONLINE OFFLINE
ractest2 STABLE
ONLINE OFFLINE
ractest3 STABLE
ora.VOTE2.dg
ONLINE ONLINE
ractest1 STABLE
ONLINE ONLINE
ractest2 STABLE
ONLINE ONLINE
ractest3 STABLE
ora.asm
OFFLINE
ONLINE ractest1 Started,STABLE
ONLINE ONLINE
ractest2
Started,STABLE
ONLINE ONLINE
ractest3
Started,STABLE
ora.net1.network
ONLINE
ONLINE ractest1 STABLE
ONLINE ONLINE
ractest2 STABLE
ONLINE ONLINE
ractest3 STABLE
ora.ons
ONLINE ONLINE
ractest1 STABLE
ONLINE ONLINE
ractest2 STABLE
ONLINE ONLINE
ractest3 STABLE
--------------------------------------------------------------------------------
Cluster Resources
--------------------------------------------------------------------------------
ora.LISTENER_SCAN1.lsnr
1 ONLINE ONLINE
ractest2 STABLE
ora.LISTENER_SCAN2.lsnr
1 ONLINE ONLINE
ractest3 STABLE
ora.LISTENER_SCAN3.lsnr
1 ONLINE ONLINE
ractest3 STABLE
ora.MGMTLSNR
1 ONLINE ONLINE
ractest3 169.254.214.12,STABL
E
ora.cvu
1 ONLINE ONLINE
ractest2 STABLE
ora.govinddb.db
1 OFFLINE OFFLINE Instance
Shutdown,ST
ABLE
2 OFFLINE OFFLINE Instance
Shutdown,ST
ABLE
3 OFFLINE OFFLINE STABLE
ora.mgmtdb
1 OFFLINE OFFLINE STABLE
ora.oc4j
1 ONLINE ONLINE
ractest1 STABLE
ora.ractest1.vip
1 ONLINE ONLINE
ractest1 STABLE
ora.ractest2.vip
1 ONLINE ONLINE
ractest2 STABLE
ora.scan1.vip
1 ONLINE ONLINE
ractest2 STABLE
ora.scan2.vip
1 ONLINE ONLINE
ractest3 STABLE
ora.scan3.vip
1 ONLINE ONLINE
ractest3 STABLE
ora.usben.db
1 ONLINE ONLINE
ractest1 Open,STABLE
2 ONLINE ONLINE
ractest2 Open,STABLE
3 ONLINE ONLINE
ractest3 Open,STABLE
--------------------------------------------------------------------------------
[root@RACTEST1 ~]#
|
Monitor the below log files and make sure no issues.
CRS_HOME/log/hostname/crsd/ – The log files for the CRS daemon
CRS_HOME/log/hostname/cssd/ – The log files for the CSS daemon
CRS_HOME/log/hostname/evmd/ – The log files for the EVM daemon
CRS_HOME/log/hostname/client/ – The log files for the Oracle Cluster Registry (OCR)
CRS_HOME/log/hostname/racg/ – The log files for the Oracle RAC high availability component
CRS_HOME/log/hostname/racg – The log files for the Oracle RAC high availability component
CRS_HOME/log/hostanme/alert.log – The alert.log for Clusterware issues.
Now we all set! RAC node conversion is completed now! Hope this post helps.
Please provide your feedback,
Please provide your feedback,
No comments:
Post a Comment